Truck air filter: when and how to change it
 Jonatan Fernandes 5 min read
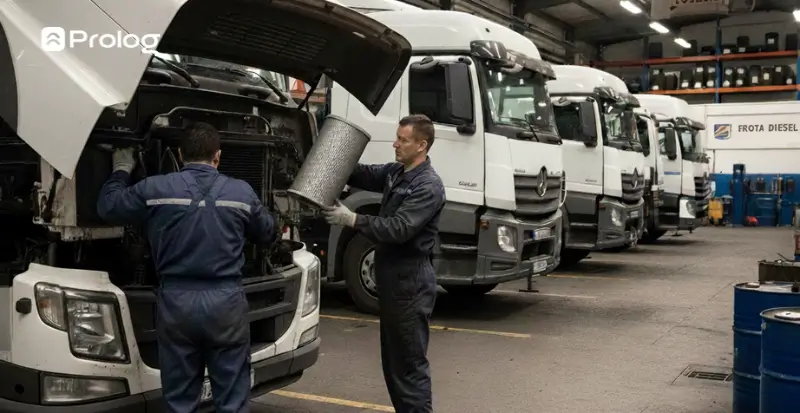
A truck's air filter is a part that keeps dust, dirt and contaminant particles from entering the combustion system. In heavy vehicles used on highways, off-road or in dusty environments, this protection helps preserve the operation of the intake assembly and the engine.
Changing truck filters regularly matters because it prevents problems such as loss of power, higher fuel consumption and mechanical failures. Filters with lower initial restriction help protect performance and fuel economy, while higher-capacity filters tend to last longer and reduce how often they need replacing. That is why the change should take into account the type of operation, the dust load in the environment and, where available, the intake system's restriction indicators.
The process is simple and can be done by the maintenance team. Below, see:
- How do you replace the air filter in trucks and heavy vehicles?
- When is the right time to change truck filters?
How do you replace the air filter in trucks and heavy vehicles?
Turn off the engine and let it cool down
Before you start, make sure the truck is turned off and the engine has cooled down completely. This prevents burns and accidents during the change. If the vehicle has just come back from its route, wait as long as needed to handle the area around the engine safely.
Find the air filter housing
A truck's air filter is usually located inside a cylindrical or rectangular housing close to the engine. Check the vehicle manual to confirm the exact location before opening the assembly, especially when the fleet has different models.
Remove the filter housing cover
Use a screwdriver or socket to loosen the screws or clips that keep the cover closed, when the assembly requires a tool. On some systems, the cover can be removed without tools, but the practical guidance stays the same: do not force any fittings, do not leave clips loose and keep the screws in a safe place so they do not get lost.
Remove the used air filter
Pull the old filter out carefully so the accumulated dirt does not fall into the filter housing. Whenever possible, the dust should stay contained in the filter during the job. If you notice debris built up in the compartment, remove it carefully, avoiding pushing dirt toward the clean side of the intake.
Compare the new filter with the old one
Before installing the new filter, compare it with the old one to make sure the dimensions and specifications match. Check the shape, seal, fittings and the application specified for the vehicle. This check reduces the risk of fitting the wrong part or leaving a path for air to enter without proper filtration.
Install the new air filter
Place the new filter inside the housing, making sure it is firmly seated. Correct alignment ensures the air is properly filtered before it enters the engine. Avoid tapping the filter element against hard surfaces to try to adjust or clean the part, because this can compromise the filter's seal or structure.
Put the compartment cover back on
After installing the filter, close the housing cover and tighten the screws or clips securely. This keeps dirt out and holds the filter in place. Check that the cover is properly seated, that no clip has been left open and that there are no displaced connections around the assembly.
Start the engine and run a test
Once the replacement is finished, start the engine and watch for any unusual noise or warning light on the dashboard. If everything is working normally, the change was successful. When the truck has a filter restriction indicator or gauge, use that information as support to assess the condition of the system and avoid changes that are too early or too late.
When is the right time to change truck filters?
The general recommendation for changing a truck's air filter should not be treated as a mileage range that is the same for every fleet. The replacement timing can change depending on the type of operation, the driving environment and, when available, the intake system's restriction reading.
Trucks that travel through very dusty regions, dirt roads, mining sites, construction sites or other severe applications tend to require closer follow-up. This is because the air filter can clog faster than in a highway operation with controlled dust, and there are filters designed specifically for heavy-dust environments.
In these cases, visual inspection helps identify accumulated dirt, damage, a poor seal or incorrect installation, but it should not be the only decision criterion. This inspection should be part of the vehicles' preventive maintenance routine, along with records of changes, mileage, operation and the condition found.
Some signs show that the air filter is clogged and needs to be assessed or replaced:
- Loss of engine power: the truck takes longer to respond when accelerating.
- Higher fuel consumption: a dirty or restrictive filter reduces combustion efficiency.
- Dark smoke from the exhaust: indicates that the air/fuel mixture may be out of adjustment.
- Unusual engine noises: irregular air intake can affect combustion.
- Warning light on the dashboard or restriction reading: some vehicles have features that help point out a limitation in airflow.
Changing a truck's air filter is a simple procedure, but an essential one for maintaining engine performance and avoiding mechanical failures. It should be scheduled and planned using a preventive maintenance plan, without relying only on a fixed mileage for every vehicle in the fleet.
If you want more efficient control of your fleet's maintenance, download Prolog's free maintenance control spreadsheet and organize your trucks' service intervals more easily!
Frequently asked questions
When is the right time to change a truck's air filter?
How do you change a truck's air filter step by step?
What are the signs that the air filter is clogged?
What happens if the air filter is not changed?
Who can change a truck's air filter?
// newsletter
Fleet management content, straight to your inbox
Articles on tires, maintenance and fleet operations. No spam.