Truck belts and pulleys: how to inspect them
 Jean Zart 4 min read
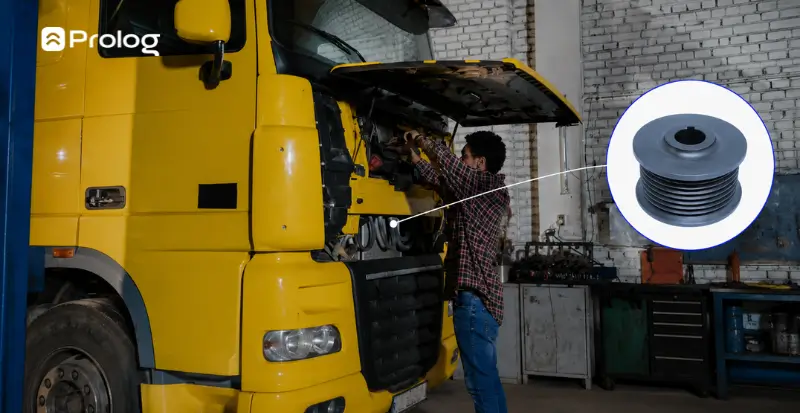
If there is one thing every fleet manager wants to avoid, it is a truck stopped by a mechanical issue, right? And when it comes to the engine and drive system, belts and pulleys are a detail that must not be overlooked.
If these parts are worn or misaligned, symptoms start subtly — an odd noise here, a slight loss of performance there — until suddenly the vehicle needs to stop for an emergency repair.
That is why inspecting truck pulleys frequently and ensuring replacement at the right time can prevent unexpected spending and keep your fleet running without surprises.
How can you identify pulley wear?
Truck pulley inspection is an essential practice in preventive maintenance of belts and pulleys. Over time, constant friction can cause material wear, misalignment or even cracks.
Some signs of wear include:
- Irregular grooves or sharp edges: if the pulley shows these signs, it may indicate the belt is not seating correctly, increasing the risk of breakage.
- Unusual noises: strange sounds, such as squeaks or whistles, may warn of excessive friction due to pulley misalignment or wear.
- Lack of belt grip: if the belt is slipping over the pulley, it may indicate the pulley grooves are worn or contaminated by oil and dirt.
- Wobbling or visible misalignment: if the pulley appears to be “dancing” while the engine is running, it is a sign of misalignment or play in the rotating shaft.
A periodic visual and manual vehicle inspection helps detect these issues before they become critical, avoiding unexpected downtime in fleet operations.
What are the most common belt and pulley drive issues?
The belt and pulley drive system is present in most trucks, ensuring engine power is correctly distributed to different vehicle components. But like any part subject to wear, it needs constant attention.
When preventive maintenance is neglected, signs of failure begin to appear: lost efficiency, strange noises and, in more severe cases, even the truck coming to an unexpected stop.
The most common issues in this system are:
Belt too loose or too tight
If the belt is too loose, it can slip and compromise power transmission. If it is too tight, it can accelerate pulley wear and even damage bearings.
Premature belt wear
Cracks, drying out or uneven wear on the sides of the belt may be signs of pulley misalignment or unsuitable materials.
System overheating
If the pulley has difficulty rotating or the belt is too tight, friction can increase, generating excessive heat and affecting truck performance.
Pulley lubrication failure
Some pulleys require lubrication to work correctly. If this care is ignored, wear may increase and abnormal noises may appear.
To avoid these issues and keep trucks operating correctly, you need to perform regular vehicle inspections and replace worn parts at the right time.
What are the steps to inspect and replace a truck's belts and pulleys?
Belt and pulley inspection and replacement should follow a careful process to avoid failures and ensure the truck keeps operating:
1. Turn off the engine and ensure safety
Before any inspection, turn the engine off completely and wait for all moving parts to stop. If possible, use personal protective equipment (PPE) and make sure the vehicle is parked in a safe place.
2. Visually inspect pulleys and belts
Check for cracks, excessive wear or accumulated dirt in the system. Look for oil or grease residue on the belt, as this can compromise its grip and efficiency.
3. Test belt tension
The belt should be properly tensioned. To test this, press the belt with your fingers halfway between two pulleys. If there is too much slack, tension may need adjustment. If it is too stiff, it can cause premature wear.
4. Check pulley alignment
Use a pulley alignment tool or straightedge to check that the pulleys are correctly aligned. Any misalignment can result in uneven belt wear and lost drive system efficiency.
5. Replace the belt and/or pulley if needed
If the belt or pulley shows signs of excessive wear, replace it. To do this:
- Release belt tension before removing it.
- Replace the worn part with a model compatible with vehicle specifications.
- Adjust the new belt correctly, ensuring it is properly positioned on the pulley.
6. Test system operation
After replacement, start the engine and observe the new belt and pulley's operation. Watch for unusual noises or excessive vibrations.
7. Record the maintenance performed
For good maintenance management, record every inspection and replacement performed. This helps predict future replacements and avoids unnecessary spending on unexpected failures.
Regularly inspecting and replacing belts and pulleys is an essential practice in fleet vehicle inspection. Small signs of wear can quickly develop into serious mechanical issues, resulting in unexpected downtime and increased maintenance costs.
If you want to keep your fleet's maintenance always up to date and reduce the risk of mechanical failures, good maintenance control makes all the difference.
Download our free maintenance control spreadsheet now (in Portuguese) and optimize your fleet management!
Frequently asked questions
I heard a whistling noise from the truck’s engine area. Could it be the pulley?
How do I know if belt tension is correct?
The truck’s belt is slipping. What should I investigate?
What steps should I follow to inspect and replace belts and pulleys safely?
Why record every belt and pulley inspection?
// newsletter
Fleet management content, straight to your inbox
Articles on tires, maintenance and fleet operations. No spam.